Ever wondered how beautiful rings are made? Look no further! In this blog, we will take you on a journey through the step-by-step manufacturing process of rings. From the initial design to the final polishing, you will learn about the careful craftsmanship and attention to detail that goes into every ring. With our expert techniques and high-quality materials, we guarantee that our rings are not only stunning but also durable and long-lasting. So why settle for a mass-produced, generic ring when you can have one that is uniquely crafted just for you? Keep reading to discover the magic behind how rings are made and be ready to be amazed!
FROM 2D SKETCH TO 3D MODELING
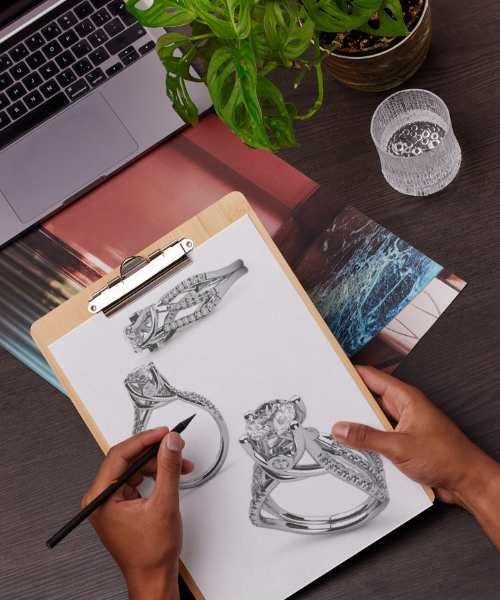
 The manufacturing process of rings is a meticulous journey that requires skilled craftsmanship. It begins with the design phase where a concept is sketched on paper. After a concept is expertly drawn on paper, advanced computer-aided design (CAD) software is utilized to bring the sketch to life. This virtual 3D model allows the designer to see the ring from every angle, providing the opportunity to fine-tune its design and ensure that every detail is in perfect harmony. Intricate features such as engravings, cutouts, and precise gem placements can be precisely planned out in this phase. Not only does this digital modeling stage save valuable time, but it also significantly reduces the risk of design errors. It provides a detailed roadmap for the craftsman, ensuring that the physical ring matches its design intent flawlessly. The immersive 3D model truly is a game-changer, bridging the gap between concept and creation.
CRAFTING THE RING’S WAX MODEL
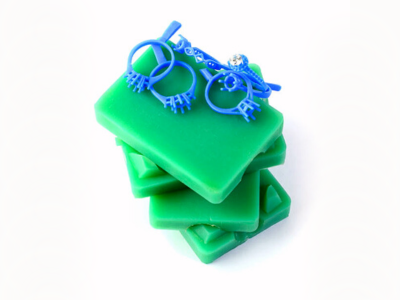
Following the detailed roadmap laid out by the 3D model, the next stage in the ring-making journey is crafting the ring's wax model. This important step brings the ring to life in a tangible, touchable form. Wax, being a soft and malleable material, allows the jeweler to carve intricate patterns and details with precision.

The wax model is a replica of the final ring, mimicking its size, shape, and detailing. It acts as a prototype, providing a preview of how the final ring will look and feel. This stage also allows the jeweler to identify and correct any potential issues before the casting process. Crafting the wax model is a delicate task that requires a keen eye and a steady hand, qualities that come with experience and expertise. Every curve and contour is meticulously shaped, and every detail is carefully added, promising a perfect foundation for the next steps of ring manufacturing. This hands-on process beautifully marries traditional craftsmanship with modern technology, underlining the artistry involved in creating a unique ring.
CREATING THE MOLD AND CASTING THE METAL
With the wax model in hand, it's time to move to the exciting stage of creating the mold and casting the metal. This process, also known as 'lost wax casting', is where the ring truly begins to take shape. Firstly, the wax model is placed into a casting cylinder and covered in a fine plaster-like substance known as 'investment'. Once the investment has set hard, the cylinder is heated in a kiln to melt away the wax, leaving behind a perfect cavity in the shape of the ring. Now comes the truly transformative moment - the casting of the metal. Molten metal is carefully poured into the cavity, filling the space once occupied by the wax model. Whether it's classic gold, modern platinum, or trendy rose gold, the choice of metal significantly impacts the look and feel of the finished ring. The metal is then allowed to cool and harden, solidifying into the first incarnation of the ring's final form. This crucial step transforms the ring from a conceptual 3D model to a solid piece of jewelry.
COOLING AND REMOVING THE MOLD
After the metal has been cast into the shape of the ring, a crucial phase of cooling follows. Patience is key here, as rushing this process could lead to the metal becoming brittle or the ring shape becoming distorted. The cylinder is left to cool gradually to ensure the metal solidifies and achieves its intended structure. This is a stage of anticipation, as the final form of the ring is about to be revealed. Once the metal has completely cooled, the next step is to remove the hardened investment mold. This is done carefully, chipping away at the investment to expose the rough casting of the ring. It’s akin to an archaeological dig, where a treasure is gradually unearthed. It's crucial not to damage the ring in this process, as any scratch or dent would require extra work during the cleaning and pre-polishing stage. This step uncovers the raw beauty of the ring, offering the first glimpse of the tangible fruits of meticulous labor and intricate planning. It's a truly satisfying moment in the ring-making journey.
CLEANING AND PRE-POLISHING
Once the ring has been carefully released from its mold, it's time to embark on the cleaning and pre-polishing stage. This is when the raw form of the ring starts to sparkle and shine. Initially, the newly cast ring goes through a process known as 'pickling'. This involves soaking the ring in a mild acid solution to dissolve any residual investment and oxidation. Following this, the ring is thoroughly cleaned using a high-pressure steam cleaner to ensure it's free from any impurities. With a clean slate, it's time to focus on pre-polishing. Using a variety of fine-grained abrasives, the craftsman works diligently to remove any scratches or surface irregularities. This meticulous process involves working on the ring's surface inch by inch, ensuring a smooth finish. Pre-polishing not only primes the ring for the final polishing phase but also reveals any remaining flaws that need attention. This critical step in the ring manufacturing process transforms the raw metal into a shining piece of jewelry, setting the stage for the final details to be added.
SETTING THE STONE
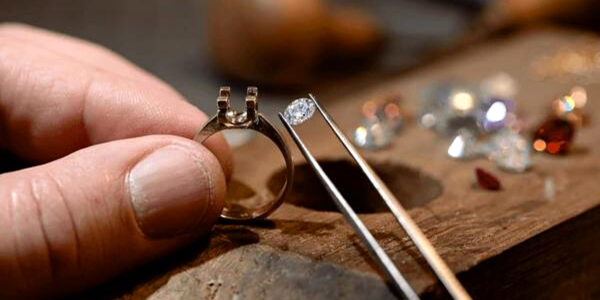
 Once the ring is shaped, polished, and ready for its crowning glory, it's time for the enthralling process of setting the stone. This phase brings the ring to life, marrying the sparkle of the gem with the luster of the metal. A jeweler carefully positions the stone onto the ring, ensuring a snug fit. The exact process can vary depending on the style of the setting.
If it's a prong setting, the jeweler bends the prongs over the stone to secure it. For a bezel setting, the jeweler will wrap a thin strip of metal around the stone. Pave settings require the jeweler to drill small holes into the ring where the stone will be placed.
During this step, attention to detail is paramount. The jeweler must be meticulous to avoid damaging the stone or the ring. Once the stone is in place, the jeweler carefully checks that it is securely fastened. A properly set stone won't wiggle or have any visible gaps. With the stone set, the ring begins to sparkle with its full potential, moving one step closer to perfection.
FINAL POLISHING AND QUALITY CHECK
 The final phase in the journey of crafting a ring is the polishing and quality check. This stage gives the ring its final shine, accentuating its beauty, and ensuring its longevity. The jeweler expertly buffs the ring using fine abrasives, eradicating any surface scratches and making the metal gleam. Polishing also highlights the brilliance of the gemstone, making the entire piece radiate with charm.
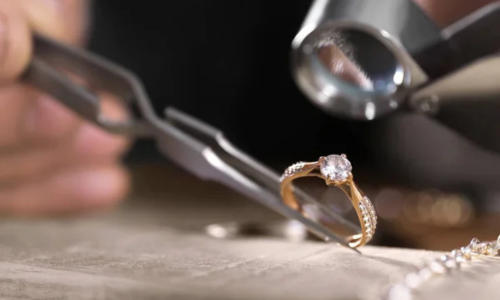
After polishing, the ring undergoes a stringent quality check. This step is crucial as it verifies the craftsmanship of the ring. Each element of the ring, from the metal band to the gemstone setting, is thoroughly inspected for any imperfections. The jewelers use magnifying tools and trained eyes to ensure the piece meets the highest standards.
This final step is not just about aesthetics, it's about honoring the promise of delivering an exquisitely crafted piece of jewelry. It's about ensuring the ring, a symbol of love and commitment, is worthy of the sentiment it carries. Once the ring passes the quality check, it is ready to become part of someone's story, bearing witness to countless cherished moments. This is the captivating journey of how rings are made.
Comments (0)